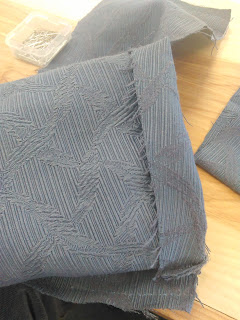
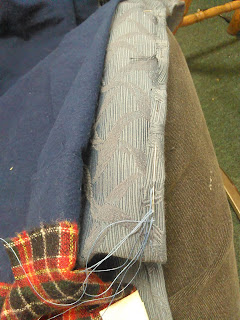
This is PART III--the final segment--of my series of articles on making my 1760s Banyan, based on that in the LACMA. If you found this article without reading the prior ones, the links for PART I (drafting the body), and PART II (sleeve drafting) are right here.
Some details to note (in no particular order):
- The lining is felled into place--absolutely no bag lining. Don't even think about it.
- Multiple layers (sometimes) of linen canvas or buckram interfacing would be used at the front edges.
- Buttons (and buttonholes) are installed before the lining is felled in place.
- The interplay of buttonhole and lining could be done in several ways. More on that when we come to it.
- Collar set into place between the turned edges of the shell and lining.
- Hem allowance was bloody narrow...I failed on that.
- The turned back cuff is a separate piece, and essentially binds the edge of the sleeve.
And so, let us begin!
Start out by seaming the center back seam of both the lining, and the shell. Use whichever running-type stitch you may prefer.
Your interlinings should be basted in place. Because I did not have enough batting, I had to use an extremely partial (upper chest and shoulders) interlining for warmth. However, you really should have the interlining (a loosely woven wool would be perfect) to the hip, or full. As said, baste it in place, and it will be worked in one with the shell.
Cut your pocket bags to taste in a medium linen or cotton. I made mine fairly deep--around 10-12 inches by 5 wide. Note that they will only be secured on one side--the straight side--and there is really nothing to secure the top to if you wanted rectangular ones.
I apologize I didn't get great photos of this step. You are going to sew each side of the pocket bag to one side of the side seam, starting at around hip level and using an extra narrow seam allowances.
At this point, you will sew up the side seam (right sides together, and pocket bag sticking out) with your normal seam allowance. In order to actually use your pockets, after sewing the first inch or so you'll skip 5-6" for the opening, then resume sewing the seam. After that, you can close up the pocket bag.
Once the side seams are sewn, do the same with the shoulders. Grade and press the seams--on a ham where necessary--then fell any which need the help staying flat. Your stitches should /not/ show on the right side.
Everything up until now has been fairly straight-forwarded, right? Time for something new, as you install the lining.
Lay out the garment, open and as flat as you can, and align the back lining in place (wrong sides together). Pin it so that all the seams line up.
Now, sew the lining to the seam allowances of the shell (overlapping the seam slightly)--go ahead and use large stitches here, since they won't show. I do recommend taking the occasional backstitch, though. Alternately, you can just secure it at the neck, sleeves, and any vents, although I might suggest basting to hold it until the next step.
When it comes time to the pocket area, skip it (but keep the section pinned!) so the bag can hang freely. Or not, if you want the bag to stay in either the front or back.
Once that is done, repeat by laying the front panels in place. The sides should overlap with the back lining by about two seam allowances. Turn this under, and fell it into place with an overcast stitch. Do the same with the shoulder seam.
At this point, you have a garment body, without sleeves. Now, go and draft them according to Part II of this series of tutorials. When you cut out the sleeves, remember to add an extra seam allowance to the top (sleevehead) of the lining.
Baste, check the fit, then sew them into place. Alternately, you can install the cuffs (the next few steps) first, which would reduce the pile of fabric on your lap.
Over that, pin the shell of your cuff, lining the edge up with fold. I suggest starting at the hind-arm seam. If your cuff measurements are correct, it should fit with the cuff seam already sewn...alas, mine were not, so I had to be able to adjust on the fly.
Now for the /fun/ part! Carefully stitch (largish stitches are fine) through the cuff and turned back section of sleeve, but not the sleeve itself...THIS IS IMPORTANT! You want to make the stitches as close to the hidden edge of the sleeve as you can.
Now, unfold your cuff and sleeve so that they have a nice overlap, and finish sewing up the cuff seam if it's not already done.
You may now check your work. If you want, anyways. Fold cuff up so that the raw edge of the sleeve is at the fold. Admire. Now get back to work!
You need the cuff unfolded for this bit. Set your cuff lining into place. I chose the same contrasting wool as my facings will be, but partial or full self linings are also an option. Pin or baste it into submission, and trim the bottom slightly so that you don't have too much bulk in the turn of the cuff.
Turn the top edges under, with the lining slightly lower so it doesn't show from the right side.
I used a hem stitch to secure it.
If you are putting buttonholes in your cuff--either working or false, this is the point where you would do that--after finishing the edge.
Now fold the cuff into place over the edge of the main sleeve. While you don't have to--if you are tacking the top of the cuff in place, adding buttons, or have a fabric which will take a good crease--I tacked through all the layers. The stitches do show on right side, but not much--you only want to catch a few threads of the outtermost layer.
Time for the lining. Shove it into place in the sleeve, aligning the seams. Remember that extra seam allowance at the sleevehead? That gets felled over the seam of the armscye. So turn that under, and secure with an overcast stitch--you should not be able to see the armscye seam.
On the other hand, if you intend to have buttons on the cuff--either working, or false ones sewn over the cuff--I suggest sewing them in place before installing the lining at the cuff. That way the securing stitches are hidden between the layers.
Turn your lining material under enough to just cover the raw edge of the cuff. Use a slip/hem/whip stitch to secure the edge.
At this point, the sleeves are completely finished. If you have buttons/buttonholes they should have already been put in.
And back to lining! Specifically, the facings. The facings themselves are 1-3 layers of heavy linen/canvas/buckram (glue stiffened canvas), and are made of on grain scraps of that material. They should be graded slightly, and basted into place. This basting can either show up on the fashion material (large stitches on the wrong side, tiny on the right), on the facing if you are doing a one piece one (same large/tiny stitches), or be removed to allow the buttonholes to secure them. The facing should be under the seam allowance of the fashion fabric (so could also be fastened to that).
On the facings: Depending on the garment, they could be optional. Options for buttonholes are to work them through the lining, through a facing, just through the shell and interlinings then have a facing pieced over them; or in the case of metallic buttonholes, through the shell/interlinings, then have the lining placed over the top, slits cut, then the edges turned under.
The collar pieces, with the fine stitching around the edges prior to turning. Edges are clipped as normal.
To set the collar in, turn the edges of the neckline under, and secure with a prick stitch through all layers. Note that the collar has no interlining, although you likely could if using a particularly light fashion fabric. You will also need to go around the outside edges of the collar with a prick stitch to harden them.
And the finished bouquet of buttons.
Do all the prep work and make your buttons according to your favourite tutorial. The topmost button should be about 1 inch from the top edge of the garment, and the bottom-most even with the top of the pocket.
A few tutorials on working 18th century buttonholes: here (video), and here (image gallery). There is also this live demo by Burnley & Trowbridge on FB.
Now you may sew the facing and lining down.
Hang the garment for a few days to allow the layers to stretch separately before marking/trimming the hem.
Interestingly, the hems are narrow...extremely narrow. As in 1/4th inch and are secured with running stitch.
The lining is then felled down over it. Lastly, secure the inverted box pleat at the back,
And that's it! You're done other than removing any basting threads that might be left.
Bibliography:
Burroughs Loba, Frances. 1996. “Eighteenth Century Men’s Civilian Waistcoats.” Virginia Commonwealth University. http://scholarscompass.vcu.edu/etd/782.
Finnchad, Brann Mac. 2015. “Matsukaze Workshops: Buttonholes through the Periods.” Matsukaze Workshops. July 16. http://matsukazesewing.blogspot.com/2015/07/buttonholes-through-periods.html.
“Handbound Costumes - Frock Coat Cuff Discussion.” 2016. Accessed December 12. https://www.facebook.com/handboundcostumes/posts/935009883272331?comment_id=935072176599435&reply_comment_id=935098513263468¬if_t=feed_comment_reply¬if_id=1477331554775373.
“Museum of London | 1765 Fawn Coloured Suit.” 2016. Accessed December 12. http://collections.museumoflondon.org.uk/online/object/86012.html.
“Suit | British | The Met.” 2016. The Metropolitan Museum of Art, I.e. The Met Museum. Accessed December 12. http://www.metmuseum.org/art/collection/search/159500.
© John
Frey, 2016. The Author of this work retains full copyright for this material.
Permission is granted to make and distribute verbatim copies of this document
for non-commercial private research or educational purposes provided the
copyright notice and this permission notice are preserved on all copies.


No comments:
Post a Comment